How to set up custom receipt printing
Introduction
In LS One it is fairly simple create custom receipt forms. Follow these few steps to get going with custom receipt printing.
For this demonstration we assume you have already set up a printer in the hardware profile (printing tab).
1: Configure the Printing Service
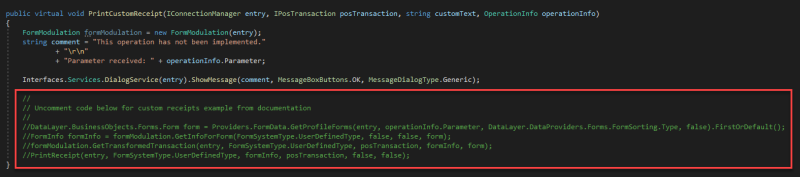
The first thing you need to do is navigate to PrintingService.Partner.cs and uncomment the commented code within the PrintCustomReceipt function.
Make sure to save the changes and build the PrintingService afterwards.
Code to uncomment in the Printing Service
2: Create new form type
The next step is to create a new form type.
Open the Site Manager and in the ribbon, select Sites. From there, under Forms and labels, click on Form types.

Choose to create a new form type by clicking the plus  in the bottom right corner below the list view.
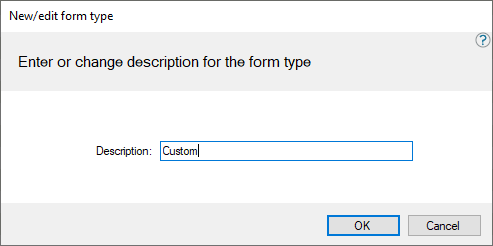
Fill in the description for the new form type like this and press OK:
3: Create new form layout
The next step is to create a new Form layout.
Open the Site Manager and in the ribbon, select Sites and from there, under Forms and labels click on Form layouts.

Choose to create a new form layout by clicking the plus in the bottom right corner below the list view.
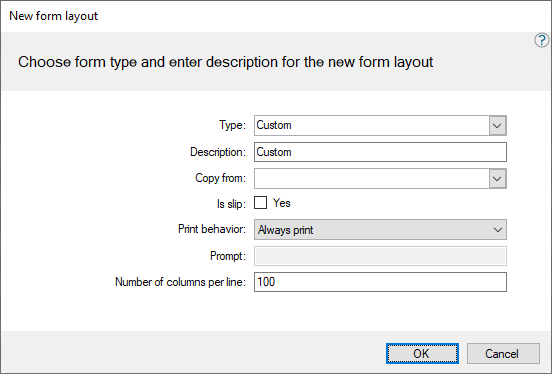
Fill in the information for the new form layout like this:
Next w add some information into the new form layout. For example some text to the header and footer and item name and item ID into the line section.
Remember this is a demonstration to get you going with custom receipt printing and you will be able to create a form layout that fits your needs building on the experience from going through this tutorial.
Notice the ID of the form layout in the upper left corner below the ribbon. We will be using this ID later in the demonstration when setting up the custom receipt printing on a button in the POS.

4: Add the form layout to the form profile
Next we add the form layout to the form profile our POS is using.

If you have the LS One default demo data it will be the Default form profile.
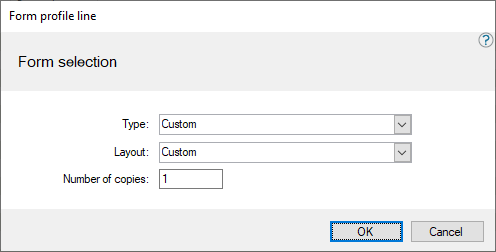
Select the profile in the upper list view and add the form layout to the profile by clicking the add button below the bottom list view.
5: Configure button in POS to print the custom receipt layout
Now open and log into the POS and right click on any button not assigned to an operation and select Button properties.
The Operation selection should be set up like in the picture below. Notice the custom text is the ID of the form layout we created earlier.
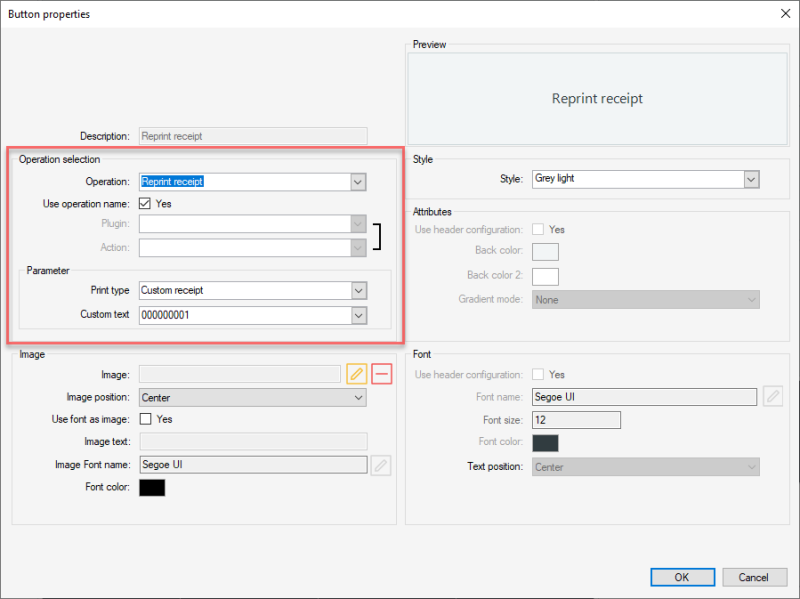
Finish the setup by clicking OK.
Now on the POS you can click the button and test the custom receipt.
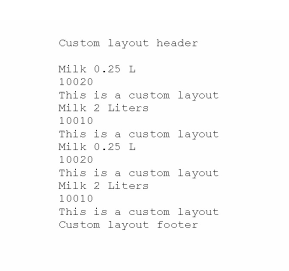
Below is the custom receipt we set up for this demonstration.
Note, if you added item information to the Lines section of the receipt, these fields will be empty if you run the operation right after starting the POS.
To see the item information start by selling some items and finishing a transaction. Then run the print custom receipt operation and you will see the item information.
We hope this demonstration has been helpful and you can take this information and use it to create your own custom receipts.

