How to Create a Report
To create a new report using new or older parameters you need to start by creating the report files.
Each report consists of two files.
• The .rpdsc report manifest file – This is the file where you define the title and description of the report, it‘s location in Site Manager and the stored procedure creating the report dataset.
• The .rdlc report file – This is the file where you use to design the look of the report, what data is shown and how.
1. Creating the Dataset query
When creating a new report it is good to start by creating the query for the report. The query can use one or more of the report parameters and display any information that can be queried from the LS One SQL database. The query is then added to the report manifest stored procedure section.
Here is an example of a simple query that displays item description, qty and amount for each item in a certain sale transaction.
select TRANSACTIONID, TERMINALID, ITEMNAME+' '+r.VARIANTNAME as ITEMNAME, sum(QTY*-1) as QUANTITY, ORIGINALPRICEWITHTAX*sum(QTY*-1) as ORGPRICE, sum(s.NETAMOUNTINCLTAX)*-1 as AMOUNTPAYED
	from RBOTRANSACTIONSALESTRANS s
	join RETAILITEM r on s.ITEMID = r.ITEMID
	where RECEIPTID = 'P0001000000016'
	group by transactionID, TERMINALID, ITEMNAME, ORIGINALPRICEWITHTAX, NETAMOUNTINCLTAX, r.VARIANTNAME
	order by TRANSACTIONID desc
After the query has been created it can be used to create the stored procedure in the report manifest file.
2. Creating the Report manifest file (.rpdsc)
The .rpdsc file is a text file with different sections. Each section is commented in the files provided. The Site Manager uses the information in this file when importing the report.
When creating a new report you need to copy an already existing Report Manifest file, fill it out correctly and add it to your project. There is template manifest file located under SM > Plugins > Report viewer > Reports > Report - Manifest_template > ReportManifest.rpdsc.
In File Explorer copy this file to a different folder and rename it to reflect the report you are creating. Then you need to fill out the different sections. Then navigate to the new file in the solution explorer and add it to the project.
Report ID – ReportID is a field that identifies the report, this should be a UUID, please use a web page like http://www.famkruithof.net/uuid/uuidgen to generate a unique UUID for the report.
Description – Extra description for the report as it will appear in some of the system menus
LanguageID - LanguageID has .NET style ISO language code, this is so that a report can for example exist in English and Swedish. Same fallback rules as in .NET localization apply, for example then de-AU falls back to de and de falls back to en if not found.
You can import two reports with the same guid into the Site Manager but it has no meaning except if they have different languageIDs. Otherwise the report is just overwritten when you import it again.
Context - Contexts tell where in the system the report should appear, a report can have one or more contexts. Supported Contexts are: Report, Button, Store, Customer, Vendor, Terminal and Item. This field should be comma separated.
Enum parameters – The enum parameters can be used for custom parameters that can then be used in the report. These parameters can be used to distinguish between different sub queries in the store procedure or to somehow constrain the data that is displayed in the report. The use of enum parameters can be seen in the Top/Bottom sales report.
Stored procedures - Stored procedures store the SQL code for the stored procedures the report uses. Please make sure that the procedures check for existence and delete the existing ones if they exist before adding. Also make sure that the procedures names are unique for each report by for example prefixing them with name of the report.
When the procedure is created the parameters must be defined. The parameters that can be used here must need to be defined in code. The existing parameters can be found in the parameter test report (Reports > Report - Parameter_Test_Report folder under the Report viewer plugin in the dev pack code) and the How to Create Custom Parameters explains how to create new ones.
The parameters are sometimes paired together where an ID parameter is used as a lookup in the stored procedure but then the NAME parameter is displayed to the user and used in the report file to display information from the parameter if needed. Examples of this are the StoreID/StoreNAME parameters. Also some parameters display a list of values and allow multiple selection like for example StoresID/StoresNAME.
	CREATE PROCEDURE [dbo].[spDB_ItemsOnReceipt]
	(
	@ReceiptID nvarchar(max),
	@DataareaID nvarchar(10)
	)
Each report definition file can contain one or more stored procedures.
You can view the example Report manifest file for the Items on receipt report using the query we created above in the stored procedure. It is in the Reports > Report - Test folder under the Report viewer plugin in the dev pack code.
3. Running the stored procedure to create the dataset
To be able to select the data set when creating the report file in the next step we need to copy the stored procedure creation script section from the manifest file and run it on an LS One database. This can be any LS One database you can connect to from your machine.
Once the script has been run the message should be: Command(s) completed successfully.
4. Creating the Report file (rdlc)
Now we need to create the Report file.
- 1. From within the Development pack project in Visual studio select the folder that keeps the Report manifest file from the Solution explorer
- 2. Then select Project > Add new item from the VS menu
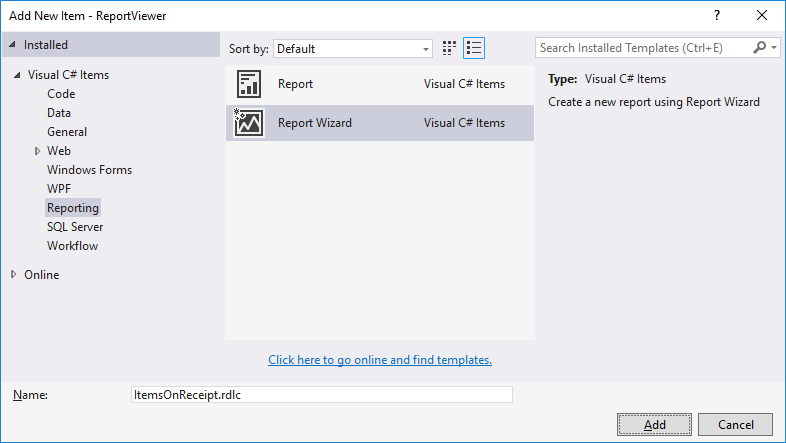
3. In the dialog select Visual C# items > Reporting > Report Wizard - Name the file the same as the Report manifest file you created above and press Add.
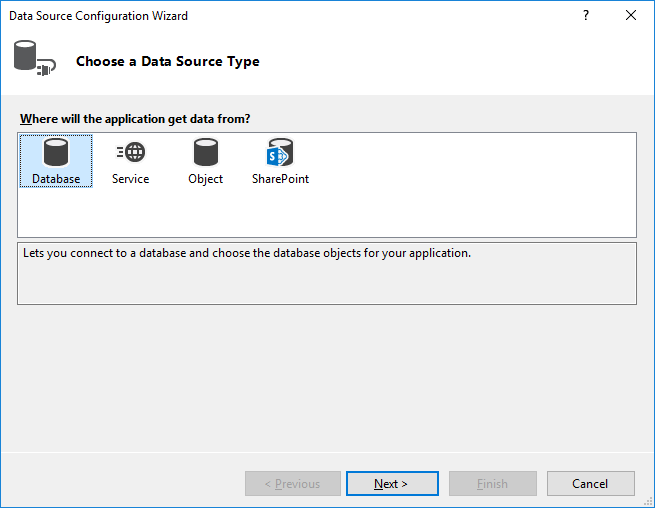
4. In the Choose your data Connection wizard select Database as the data source type and press Next
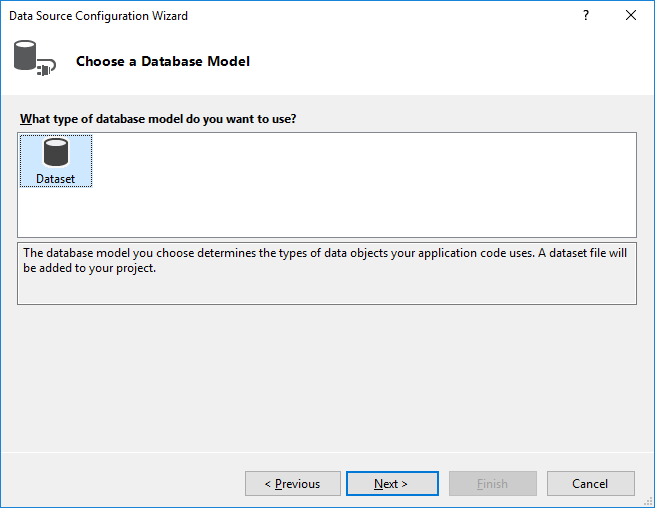
5. Select Dataset and press Next
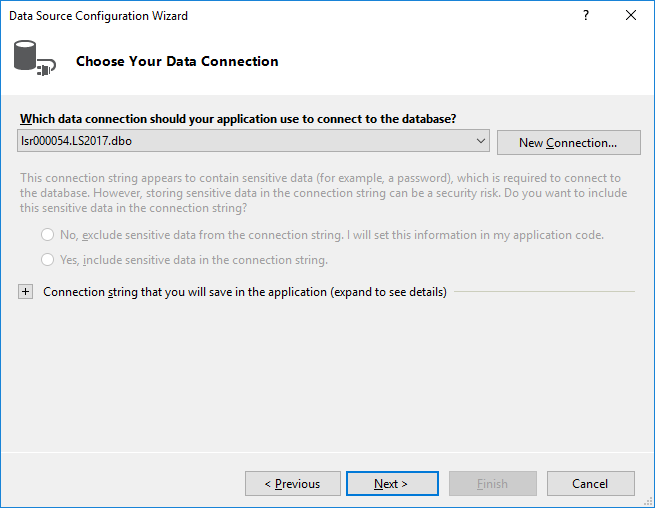
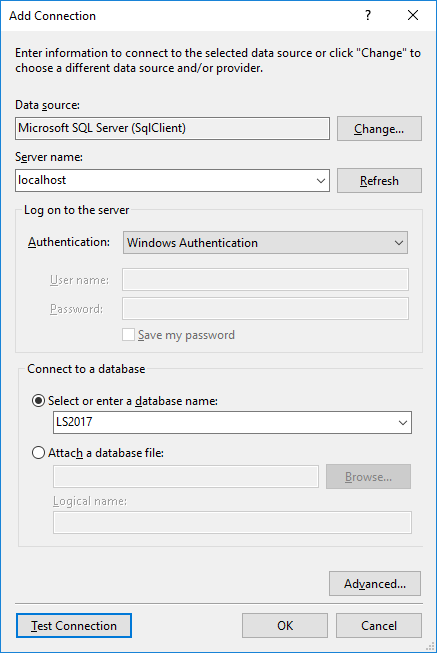
6. In the Choose your data connection dialog press New Connection button and create the connection string to the database where you created the store procedure. You will need to enter the server name (localhost or localhost\SQLEXPRESS) and select the database from a list of databases. Then press OK and the dialog closes and you can press next.

7. You can now select a name for your connection string if you want to be able to use it again. Press next

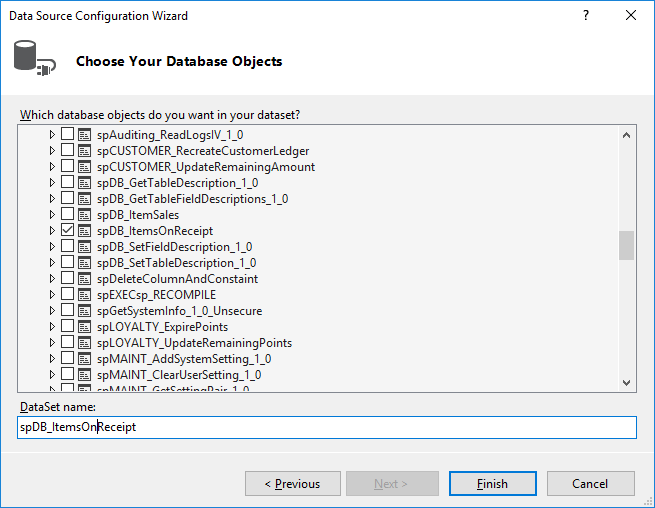
8. The wizard now displays the database objects and you need to expand the stored procedures section and locate the procedure your created and check the box in front of it. Also name the dataset the same as the stored procedure and press Finish.
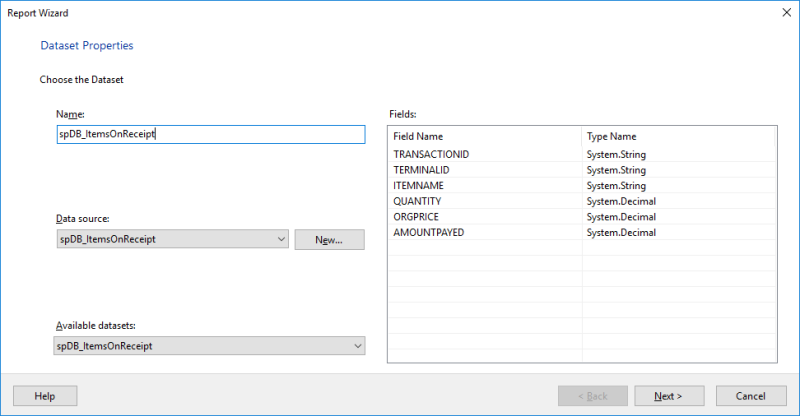
9. In the next window you should also set the name of the dataset to the same as the store procedure. If you do not do this the call to the procedure from the Site Manager will not work and the report will not run. Do this and press Next.

10. In the arrange fields dialog you can select whether you want some of the fields to represent column groups or row groups and which values you want the table to display. Drag the fields to the appropriate boxes and press Next.
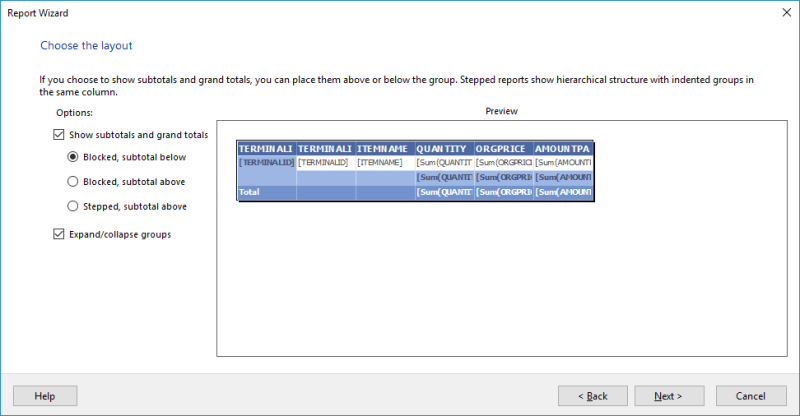
11. Next you choose the table layout and press Next.
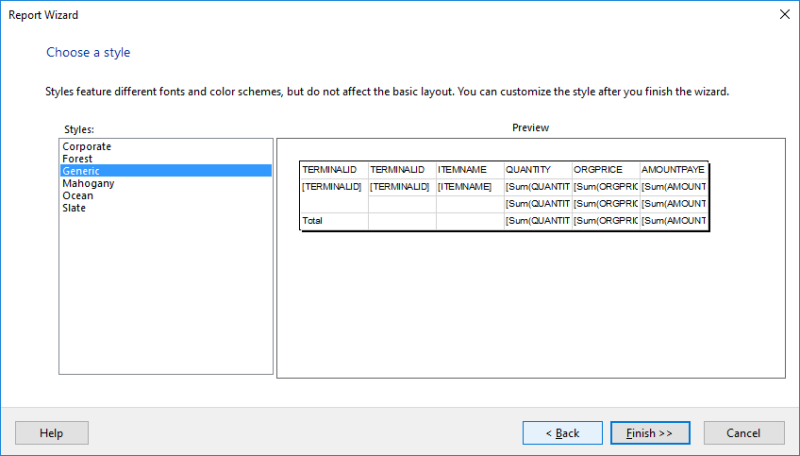
12. Then you choose the table style - the style of the LS One system reports is not defined here but generic can be used and adjusted. After selecting a style you can press Finish and the report file has been created.

13. Next you need to add the parameters defined in the stored procedure. In the menu select View > Report Data (or press Ctrl + Alt + D). In the Report data menu on the left select the Parameters folder right click and select Add Parameter. Enter the name of the parameter you want to add. It should be the same as the name of the parameter in the stored procedure unless you are using pair parameters (ID/NAME). Select the correct Data type and whether it allows blank or multiple values. Press OK. Repeat this for all parameters used in the report. (DataareaID parameter does not need to be added)
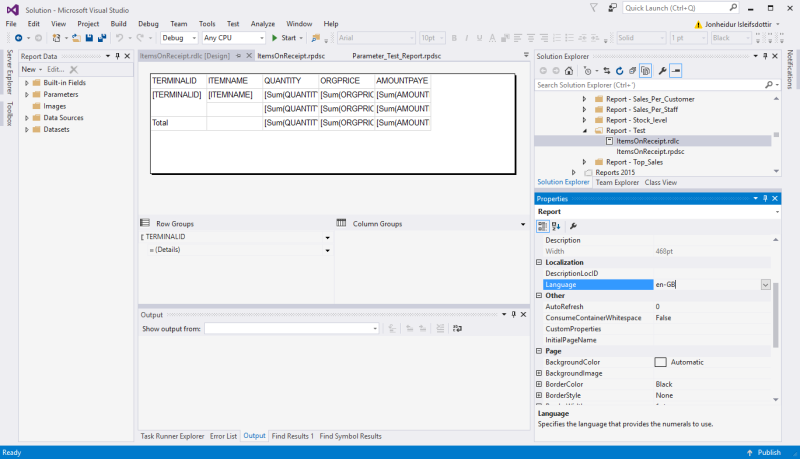
14. Next you need to set the language property of the report. In the properties menu on the right/bottom select Report and find the Localization > Language property. Select the language property you used in the Report manifest. For english we usually choose en in the manifest and en-GB or en-US in the report file.
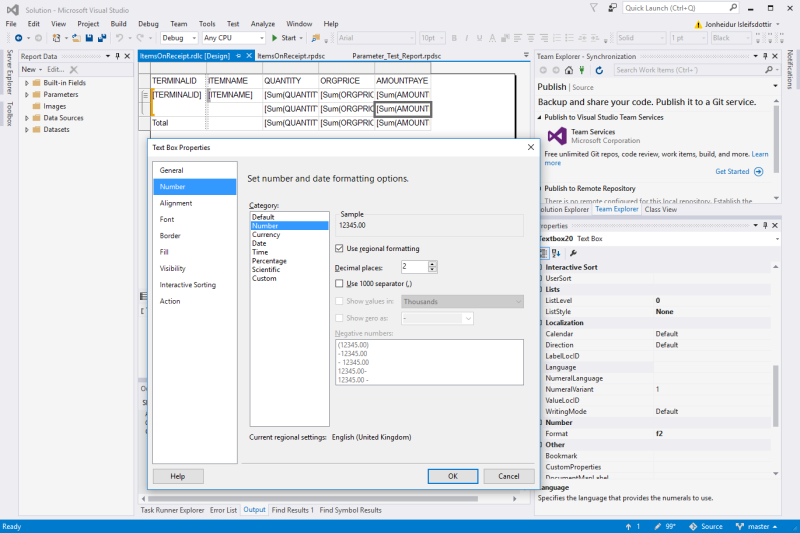
15. Now all that is left is to edit the layout of the tablix and to add a header and footer to the report. There are example report in the project that can be reviewed for this purpose. To edit the fields of the tablix you just select until there is a gray ring around the cell and right click and select text box properties. There is more info on the how to edit the layout of reports in the edit reports section.
16. Next save the report files and import them into Site Manager. Reports you create this way can be imported directly into a standard LS One Site Manager unless you have added new custom parameters. Then you need to create a new Site Manager build from the dev pack.
How to import reports can found in the Report section of the online help. If something is wrong with the report an error will be displayed when importing or when running. Site Manager needs to be closed and reopened for new imported reports to appear in the report list in the ribbon, Tools > View report.

