How to implement Extra info variables
If you need to add customized text to your receipts, you can use the Extra Info fields. There are a total of 5 different extra info fields that can be customized by following the next steps:
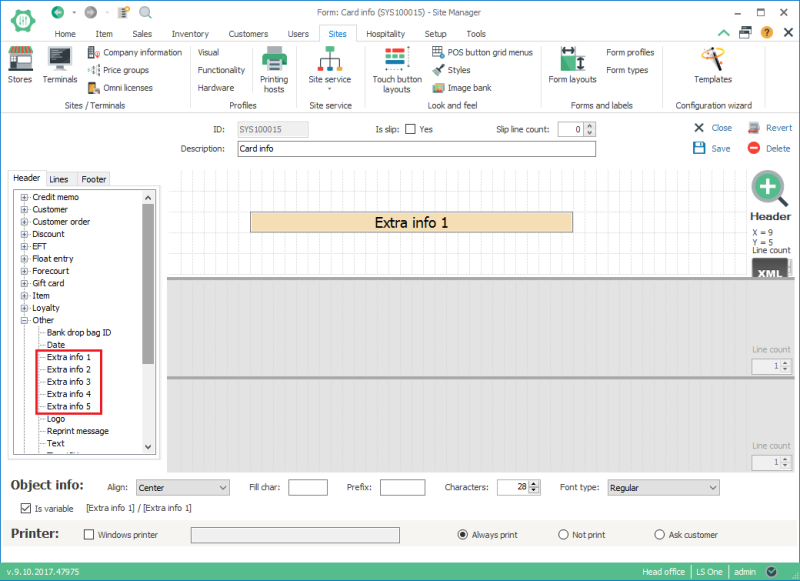
1. Adding the Extra Info field onto your receipt
To add an extra info field to your receipt, open Site Manager and navigate to Sites > Form layouts and open a receipt. After opening the receipt, you can find the extra info fields under the Other category in each section of the receipt (Header, Lines, Footer). Each section contains 5 extra info items that can be added to the receipt by simply dragging the item to the receipt.
2. Adding code to populate the Extra Info fields
After adding the extra info field to the receipts, you will need to set the information that will be displayed in each field. To do this, open the Development Package solution and navigate to POS > PrintingService > FormModulation.Partner.cs. In this file you will find two methods called GetPartnerInfoFromTransaction and GetPartnerInfoFromSaleLineItem. The first one will set the extra info values in the header and footer section of the receipt, based on the transaction, while the second one will set the extra info values based on the sale line items.
	protected string GetPartnerInfoFromSaleLineItem(IConnectionManager entry, FormItemInfo itemInfo, SaleLineItem saleLine, out bool skipIfEmptyLine)
	{
		skipIfEmptyLine = false;
		string returnValue = string.Empty;

		switch (itemInfo.Variable.ToUpperInvariant().Replace(" ", ""))
		{
			case "EXTRAINFO1": returnValue = "EXTRAINFO1"; break;
			case "EXTRAINFO2": returnValue = "EXTRAINFO2"; break;
			case "EXTRAINFO3": returnValue = "EXTRAINFO3"; break;
			case "EXTRAINFO4": returnValue = "EXTRAINFO4"; break;
			case "EXTRAINFO5": returnValue = "EXTRAINFO5"; break;
		}

		return returnValue;
	}
To set which information will be visible for each extra info item, you just need to set the returnValue of the corresponding extra info item case.

