How to implement a POS Plugin
Introduction
POS plugins are similar to blank operations in function but allow you to drop in a DLL with a predefined operation list without having to add any data to the database. This also allows you to have customized operations without overwriting an existing DLL like the blank operations.
A POS Plugin is made up of two interfaces:
- IPOSPlugin: This provides the entrypoint to your plugin and is called by the POS when executing the "Execute POS plugin" operation on a button.
- IPOSPluginSetupProvider: This is an optional support interface that your IPOSPlugin implementation can also implement. If this is implemented in your IPOSPlugin class then the POS and Site Manager will retrieve additional information from the plugin to provide a better user-experience when configuring the button that runs your plugin.
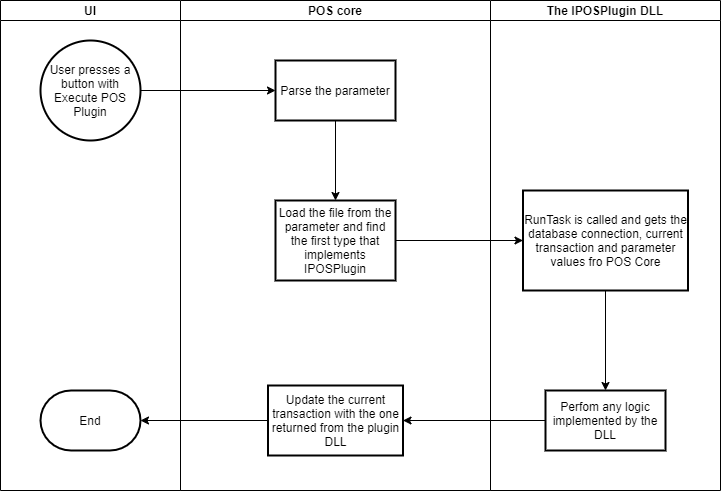
The following diagram shows the flow when a user presses a button that has been configured to run the operation "Execute POS plugin" :
IPOSPlugin interface
Defines a plugin for the POS that can be executed from a button when running the operation "Execute POS plugin"
| Name | Description |
|---|---|
| IPosTransaction RunTask(IConnectionManager entry, ISession session, ISettings settings, IPosTransaction transaction, OperationInfo operationInfo, string task, List<string> args) | Called by the POS when the user runs the "Execute POS plugin". The POS will supply the database connection, session, current transaction and the task- and parameters that were selected on the button. |
IPOSPluginSetupProvider interface
Provides information about an IPOSPlugin to display to the user when he is configuring a button for the POS. If a IPOSPlugin does not implement this interface then the user must manually enter all the relevant information.
| Name | Description |
|---|---|
| List<POSPluginTask> PluginTasks { get; } | Returns the list of tasks that theIPOSPlugin can execute. |
POSPluginTask class
Used by IPOSPluginSetupProvider to describe a single task and it's parameter type. This is used when configuring an IPOSPlugin on a button to allow the user select the type of parameter rather than manually entering all the information.
| Name | Description |
|---|---|
| public string Description { get; set; } | The description of the action. |
| public string TaskID { get; set; } | The ID of the action. This is passed to IPOSPlugin.RunTask as the task parameter. |
| public LookupTypeEnum LookupType { get; set; } | Gets or sets the LookupTypeEnum that should be used when configuring this task. This will set what kind of parameter the user can configure in button configuration dialog for the POS. |
Implementing IPOSPlugin
This is a simple interface that has just one method: RunTask. This is the method that the POS calls with the information set up by the user.
1: Create your POS Plugin assembly
- Create a project of type "class library".
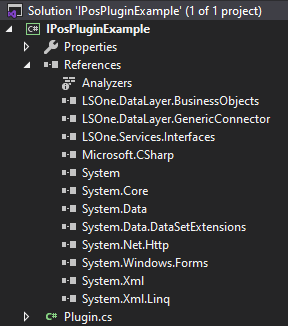
- Add references to the following LS One assemblies:
LSOne.DataLayer.BusinessObjects.dll
LSOne.DataLayer.GenericConnector.dll
LSOne.Services.Interfaces.dll
- Add a class that implements IPOSPlugin.
Example: A simple POS plugin solution
Plugin.cs example:
public class Plugin : IPOSPlugin
{
    public IPosTransaction RunTask(IConnectionManager entry, ISession session, ISettings settings, IPosTransaction transaction, OperationInfo operationInfo, string task, List<string> args)
    {
        // Perform any custom logic and apply it to the transaction before returning it

        // For demonstration we'll just show the task and args values
        string message = task + "\r\n\r\n";
        args.ForEach(p => message += p + "\r\n");
        MessageBox.Show($"Hello world!\r\n\r\n{message}");

        return transaction;
    }
}
2: Getting the plugin into the POS
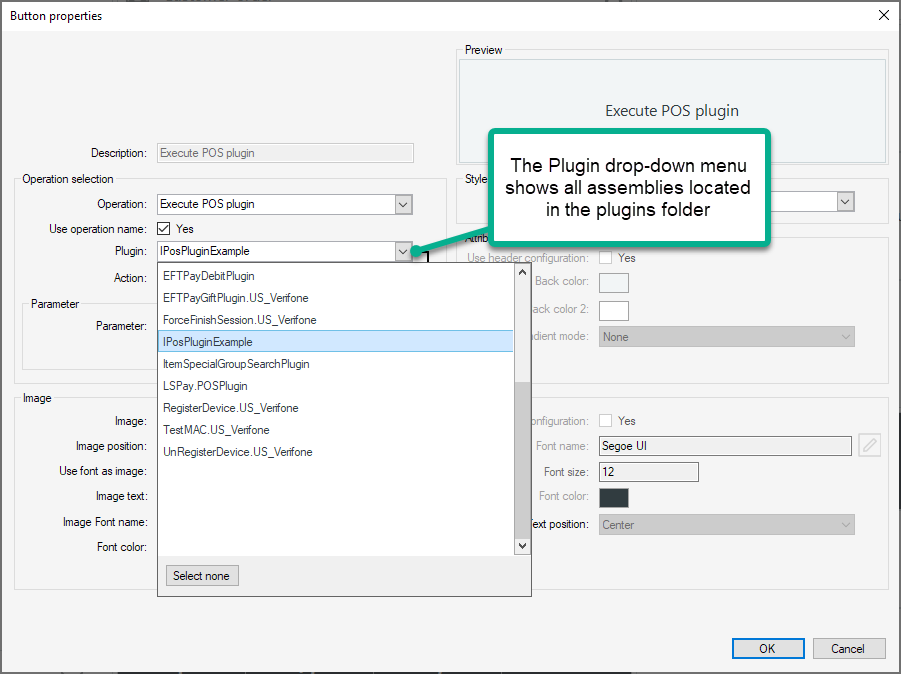
The POS will look in the plugins folder for any IPOSPlugin implementations. To make your plugin visible to the POS simply place it into that directory.
Examples:
- LS One POS installed from installer: C:\Program Files (x86)\LS Retail\LS One POS\plugins
- POS build folder in development pack: <path to svn checkout directory>\DevPack\Source\POS\Build\plugins
3: Configuring a button in the POS
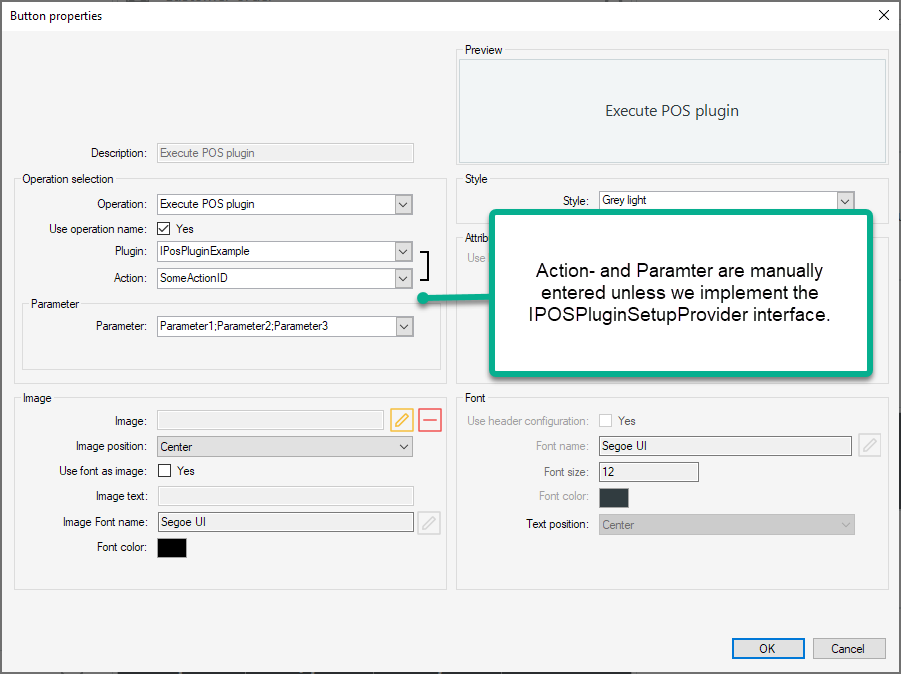
Once you have your DLL in the plugins folder you can start the POS and configure a button to execute your plugin.:
3: Running the plugin from a button
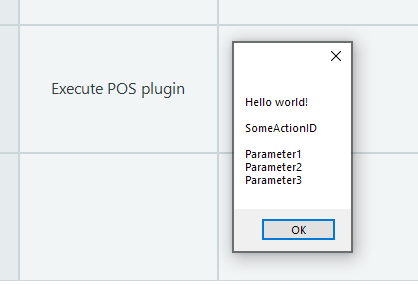
Now that you have a button configured you can press the button and the POS will load your plugin DLL and execute the RunTask method:
4: Configuring the button from the Site Manager
The Site Manager uses the same configuration dialog but it does not have the same plugin structure as the POS. In order to get your plugin DLL to show up in the plugin drop-down menu when designing from the Site Manager you need to place your DLL into the POSPlugins folder for the Site Manager.
Implementing IPOSPluginSetupProvider
The previous steps described how to implement a basic POS plugin where the user that configures the button must manually type in the action- and parameter values. Through the IPOSPluginSetupProvider interface you can provide the user with the following options:
- A pre-defined list of actions that the user selects rather than types in
- A range of pre-defined parameter types that allows the user to select the parameter that is to be sent into the args paramter for RunTask
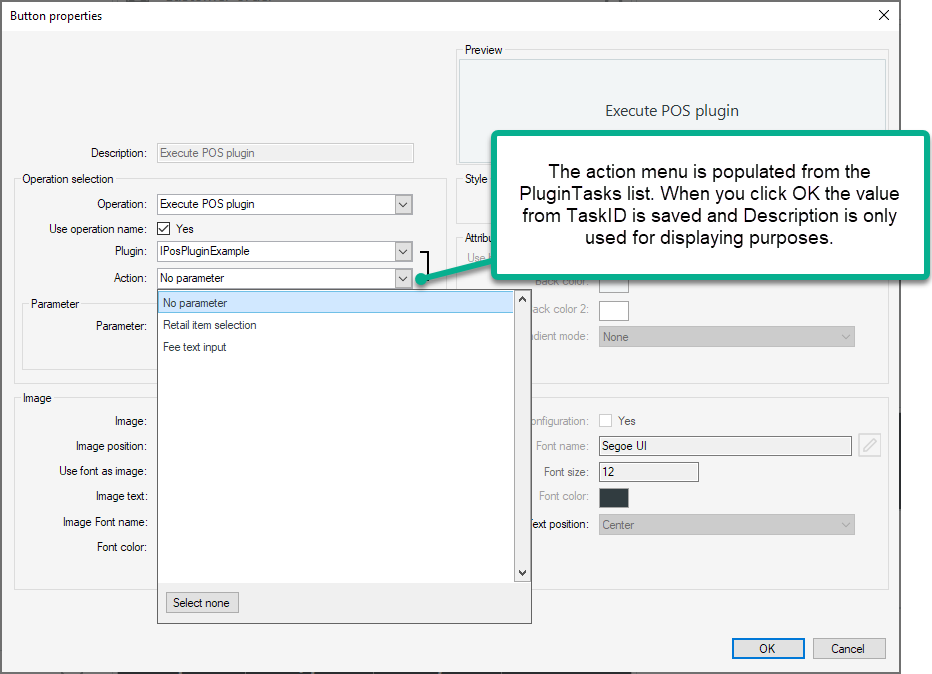
Below we'll implement this interface for the IPosPluginExample plugin and add three different actions:
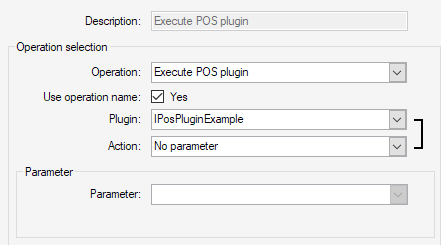
- NoParameter: Will disable the Parameters box to indicate that there should not be any parameter required
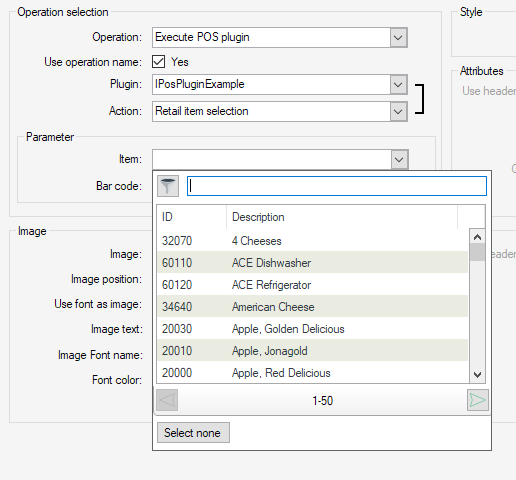
- RetailItemParameter: Will show a retail item selection for the Parameters box in the same way an item sale operation is configured
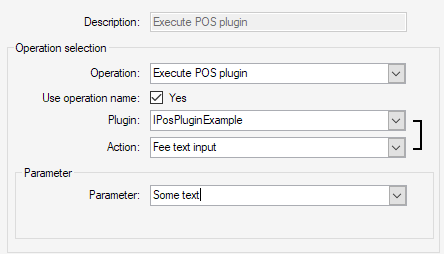
- TextInputParameter: Will work the same way as before where the user can enter any text into the Parameters box
Example implementation for IPosPluginExample
public class Plugin : IPOSPlugin, IPOSPluginSetupProvider
{
    private List<POSPluginTask> pluginTasks;

    public Plugin()
    {
        pluginTasks = new List<POSPluginTask>();

        pluginTasks.Add(new POSPluginTask()
        {
            Description = "No parameter",
            TaskID = "NoParameter",
            LookupType = LSOne.DataLayer.BusinessObjects.TouchButtons.LookupTypeEnum.None
        });

        pluginTasks.Add(new POSPluginTask()
        {
            Description = "Retail item selection",
            TaskID = "RetailItemParameter",
            LookupType = LSOne.DataLayer.BusinessObjects.TouchButtons.LookupTypeEnum.RetailItems
        });

        pluginTasks.Add(new POSPluginTask()
        {
            Description = "Fee text input",
            TaskID = "TextInputParameter",
            LookupType = LSOne.DataLayer.BusinessObjects.TouchButtons.LookupTypeEnum.TextInput
        });
    }

    public List<POSPluginTask> PluginTasks => pluginTasks;

    public IPosTransaction RunTask(IConnectionManager entry, ISession session, ISettings settings, IPosTransaction transaction, OperationInfo operationInfo, string task, List<string> args)
    {
        // Perform any custom logic and apply it to the transaction before returning it

        // For demonstration we'll just show the task and args values
        string message = task + "\r\n\r\n";
        args.ForEach(p => message += p + "\r\n");
        MessageBox.Show($"Hello world!\r\n\r\n{message}");

        return transaction;
    }
}
This addition will tell the button properties dialog that our IPosPluginExample plugin can show a list of actions and it can configure the Parameters box to fit each action. Now the button properties dialog will behave as follows: